

DIY Halloween Costume Techniques: Easy Tips for Any Skill Level to Follow
Cardboard, safety pins, hot glue, and an old bedsheet can get you surprisingly far. But if you want your Halloween costume to survive a full night of walking, dancing, taking photos, and being pulled in six directions, the construction matters as much as the idea.
The best DIY Halloween costume techniques start with one simple principle: build according to how the costume will actually be worn. A beginner can create a convincing look with household materials, while a more ambitious maker can borrow techniques from the professional fabrication culture surrounding Glendale and Los Angeles.
Here is how to move from quick costume hacks to durable, convention-level construction without making every project unnecessarily complicated.
What are easy DIY costume techniques for beginners?
The easiest DIY costume techniques focus on modifying clothes and household materials rather than constructing an entire garment from scratch. Layering, cutting, gluing, pinning, painting, and adding recognizable accessories can transform ordinary pieces into a convincing costume with minimal tools.
Start with the silhouette before worrying about small details.
A black dress, oversized blazer, white shirt, or pair of jeans can become the foundation for dozens of recognizable characters. Add the right hairstyle, prop, makeup, or accessory and the costume suddenly has context.
For a beginner DIY costume, prioritize:
- Silhouette: Choose clothing that immediately suggests the character or concept.
- Color: Match the dominant colors before chasing tiny details.
- Accessories: Use one or two recognizable props to establish the theme.
- Texture: Add layers such as leather, denim, flannel, mesh, or faux fur.
- Fit: Make sure everything stays comfortable when you move.
The goal is not to manufacture every component yourself. The goal is to make the finished costume look intentional.
How do you make a costume without sewing?
You can make a costume without sewing by combining fabric glue, safety pins, adhesive fasteners, elastic, double-sided fashion tape, and strategically placed knots. Start with an existing garment, then alter its shape or add layers rather than constructing the entire costume from raw fabric.
Fabric glue works well for lightweight decorative additions, while safety pins are useful when you need a temporary alteration that can be reversed later.
For a more secure no-sew costume idea, consider:
- Fabric glue for patches, trims, and lightweight embellishments
- Safety pins for temporary shaping
- Hook-and-loop fasteners for removable accessories
- Elastic bands for adjustable components
- Fashion tape for temporary placement
- Hot glue for rigid decorative pieces
Test the attachment before Halloween night. Something that holds for five minutes in front of a mirror may not survive hours of movement.
How do you attach fabric without a sewing machine?
Attach fabric without a sewing machine by choosing the adhesive or fastening method according to the fabric’s weight. Fabric glue works for lightweight applications, while safety pins, hook-and-loop fasteners, and hand stitching provide stronger options when a costume needs to withstand repeated movement.
Heavy fabrics need more support than thin decorative fabric.
For temporary costumes, safety pins can be the fastest solution. For pieces you expect to reuse, a stronger attachment method is worth the extra preparation.
Keep the attachment hidden whenever possible. A clean inside edge can make an inexpensive DIY build look considerably more polished from the outside.
What tools do you need to start making costumes?
You can begin costume construction with a small toolkit rather than a workshop. Scissors, a measuring tape, hot glue gun, fabric adhesive, utility knife, ruler, hand-sewing needles, thread, safety pins, and basic paints cover many beginner projects.
A useful starter kit includes:
| Tool | What it helps you do |
|---|---|
| Fabric scissors | Cut cloth cleanly |
| Utility knife | Cut foam and thicker materials |
| Measuring tape | Check fit and dimensions |
| Hot glue gun | Attach lightweight decorative components |
| Fabric glue | Bond fabric without machine sewing |
| Ruler | Create straight cuts and consistent shapes |
| Safety pins | Make temporary alterations |
| Needle and thread | Reinforce important attachment points |
| Sandpaper | Smooth foam and finished surfaces |
| Acrylic paint | Add color and surface details |
As your projects become more ambitious, your tools should evolve with them.
What are quick DIY costume hacks using household items?
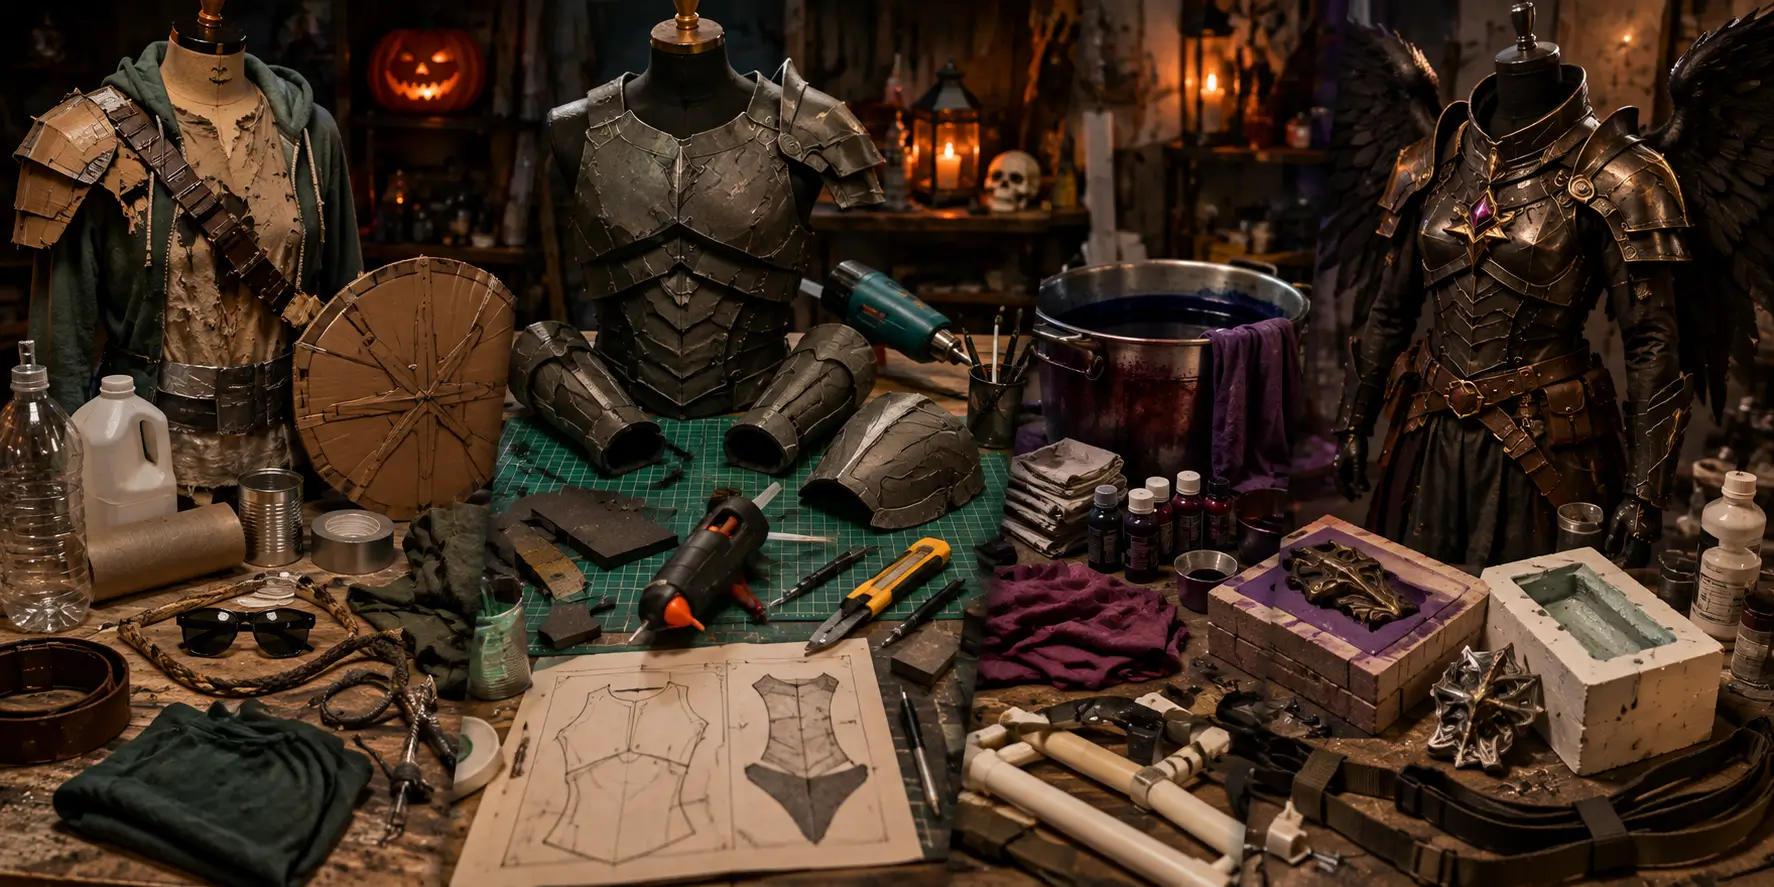
Household objects can become effective costume components when you focus on their shape and function. Cardboard can form simple armor or props, old clothing can provide costume layers, plastic containers can become structural components, and unused accessories can supply finishing details.
Look around the house before buying materials.
An old belt can become a utility harness. Cardboard can create a shield, sign, book cover, or prop base. A discarded pair of sunglasses can change the entire personality of a character.
The trick is to disguise the original object through paint, fabric, trimming, or layering.
That is what separates a household-item costume from something that simply looks like household items taped together.
How do you make costume armor out of foam?
Costume armor is commonly built from EVA foam because it can be cut, shaped, layered, and finished into structured pieces. Start by creating a template, transfer it to foam, cut carefully, heat-shape curved sections, and reinforce joins before adding primer and paint.
Do not begin with the most complicated piece.
Start with a bracer, shoulder plate, belt component, or simple chest section. These smaller pieces teach you how foam behaves before you commit to a full suit.
For a stronger build:
- Create a paper or cardboard template first.
- Check the template against your body before cutting foam.
- Use a sharp blade for clean edges.
- Heat-shape curved sections carefully.
- Reinforce important joins.
- Seal and prime the surface before painting.
- Test the finished piece while moving.
The more structured the armor becomes, the more important weight and mobility become.
How do you make a costume more durable for wear?
Make a costume more durable by reinforcing high-stress attachment points, choosing materials according to their intended use, securing loose components, and testing the costume before the event. Pay particular attention to straps, seams, closures, footwear, and pieces that repeatedly move against your body.
A costume worn for a photo shoot can tolerate very different construction standards from one worn all night.
Before Halloween, walk around in the complete costume. Sit down. Climb stairs. Raise your arms. Carry the props you intend to carry.
Those simple tests reveal problems while they are still easy to fix.
What is the easiest way to dye fabric for a costume?
The easiest fabric-dyeing method depends on the fabric itself, so check the material before choosing a dye. Wash the fabric first, follow the dye manufacturer’s instructions, and test a small hidden section before committing to the complete garment.
Dyeing can be particularly useful when the right costume color is difficult to find.
For a controlled result, work with clean fabric and measure the dye consistently. Remember that the finished shade can change depending on the original color, fabric composition, temperature, and dyeing method.
If the costume only needs a temporary color change, fabric paint, sprays, or removable surface treatments may be more practical than permanently dyeing the garment.
How do you make a costume more durable at an advanced level?
Advanced costume construction focuses on material selection, structural reinforcement, weight distribution, surface preparation, and finishing. These techniques become particularly useful for armor, large props, wings, backpacks, and full-suit builds that need to withstand extended wear.
This is where DIY costume making starts to overlap with professional fabrication.
Around Glendale and Los Angeles, makers benefit from proximity to the entertainment, garment, and special-effects industries. The result is a local culture where serious costume builders can approach Halloween and convention projects with considerably more technical ambition.
Source materials beyond the craft aisle
For advanced projects, material selection becomes part of the design.
Southern California makers can source materials through the Los Angeles Fashion District, including industrial thermoplastics such as Worbla and KobraCast, specialized faux leathers, heavy coutil mesh, and raw canvas.
High-density EVA foam and industrial neoprene can also provide more structure for armor and wearable components than lightweight hobby materials.
The principle is straightforward: use the material for the job it needs to perform.
A decorative accessory does not need the same construction as a chest plate that will be worn for hours.
Build internal structure into large costumes
Large wings, heavy backpacks, and full armor assemblies create a problem that paint cannot solve: weight.
Advanced makers can incorporate hidden PVC pipe framing, heavy-duty nylon webbing, and load-bearing tactical belts to distribute weight through the body. Moving some of that load toward the hips instead of leaving it concentrated on the shoulders can make an elaborate costume substantially more wearable.
You do not need to build a military-grade harness for every Halloween project. But understanding weight distribution can save an ambitious costume from becoming uncomfortable before the night is over.
Use molds and casting for repeatable pieces
When a costume requires multiple matching components, casting can provide consistency.
A maker can sculpt an original component, create a two-part box mold using silicone such as OOMOO or another appropriate molding system, and cast copies using rigid polyurethane plastic.
That is a significant step beyond beginner DIY. It is also a useful example of how professional fabrication techniques can solve problems that cutting and gluing cannot.
How do you get a professional finish on a DIY costume?
A professional finish comes from surface preparation rather than simply adding more paint. Smooth the substrate, eliminate visible texture, prime the surface, sand between layers where appropriate, and build color gradually instead of trying to create the finished appearance in one coat.
Foam is a perfect example.
Its natural texture can remain visible beneath paint and immediately reveal how the piece was made. Advanced builders can use high-fill automotive primer filler, then wet-sand the surface with fine-grit sandpaper such as 600 grit to create a smoother foundation.
Airbrushing can take the finish further.
A dual-action gravity-feed airbrush allows controlled color gradients, layered shadows, weathering, and grime effects that are difficult to achieve with a standard brush.
The important lesson is not that every Halloween costume needs automotive primer or an airbrush. It is that finishing deserves the same attention as construction.
What are good DIY techniques for costume accessories?
The best DIY accessory techniques start with recognizable shapes and then add texture, color, and finishing details. A simple base can become convincing through paint, fabric wrapping, weathering, hardware, or carefully chosen decorative elements.
Try building accessories around a clear visual reference.
Useful beginner and intermediate projects include:
- Character-specific belts
- Faux weapons and prop replicas
- Decorative masks
- Shields and armor pieces
- Custom jewelry
- Staffs and fantasy props
- Shoulder pieces
- Themed bags and pouches
If the accessory is going to be carried for several hours, test its weight and grip before Halloween.
A spectacular prop that becomes uncomfortable after twenty minutes is not a successful costume accessory.
How do you fix a costume malfunction quickly?
Fix a costume malfunction quickly by carrying a small emergency repair kit containing safety pins, fashion tape, fabric adhesive, spare fasteners, scissors, and a few pieces of strong tape. Repair the structural problem first, then restore the appearance once the costume is secure.
Your emergency kit can fit inside a small pouch.
Pack:
- Safety pins
- Fashion tape
- Fabric adhesive
- Small scissors
- Clear or matching thread
- Hook-and-loop fasteners
- Strong tape
- Spare elastic
- A few replacement accessories
Test the costume before leaving home and identify the component most likely to fail. Preparing for that specific failure is much more useful than carrying an enormous collection of random supplies.
Where Kreepy Halloween fits into a serious DIY build
Not every component needs to be fabricated from scratch.
That is an important distinction for anyone who enjoys making costumes. DIY should give you control over the details that matter, not force you to spend hours constructing something that is already available in a finished form.
Kreepy Halloween brings together a large selection of costumes, accessories, wigs, makeup, and other Halloween components, giving you a practical starting point when you want to build a more customized look.
With a curated approach, you can combine professionally finished pieces with your own fabrication work. Buy the difficult-to-reproduce foundation, then spend your creative energy modifying, weathering, layering, or accessorizing it.
That is often how you get a costume that feels handmade without looking unfinished.
Build your Halloween costume at your skill level
The best DIY Halloween costume is not necessarily the one with the most complicated construction.
If you are new to costume making, start with clothing modification, no-sew construction, household materials, and distinctive accessories. If you have more experience, move into EVA foam, structured pieces, advanced finishing, and weight distribution.
And if you are building something closer to a convention-level costume, borrow the mindset of professional fabrication: choose materials deliberately, engineer for movement, reinforce the stress points, and treat finishing as part of the construction.
Kreepy Halloween can supply the pieces that make sense to source, while your own creativity handles the details that make the final look yours.
Start Building Your Costume at Kreepy Halloween
Your next costume does not need to begin with a sewing machine or a workshop full of equipment.
Start with the character, silhouette, or idea you want to create. Then decide what you can build, what you can modify, and what is better sourced as a finished piece.
Ready to turn your idea into an extraordinary Halloween look? Explore Kreepy Halloween’s costume, accessory, wig, and makeup selection, then build the details that make it unmistakably yours.
FAQs
What are easy DIY costume techniques for beginners?
Start with clothing modification, layering, no-sew attachments, simple props, and accessories. These techniques let you create a recognizable costume without requiring advanced fabrication equipment or sewing experience.
How do you make a costume without sewing?
Use existing clothing as the foundation and modify it with fabric glue, safety pins, fashion tape, elastic, hook-and-loop fasteners, and other temporary or semi-permanent attachment methods.
What tools do you need to start making costumes?
A beginner toolkit can include fabric scissors, a utility knife, measuring tape, a hot glue gun, fabric adhesive, safety pins, a ruler, needles, thread, sandpaper, and basic paint.
How do you attach fabric without a sewing machine?
Use fabric glue for lightweight applications, safety pins for temporary alterations, or hook-and-loop fasteners for removable components. Reinforce areas that experience repeated movement.
What are quick DIY costume hacks using household items?
Old belts, cardboard, sunglasses, bags, clothing, plastic containers, and unused accessories can become costume components. Paint, fabric, layering, and trimming can disguise the original object.
How do you make costume armor out of foam?
Create a template, transfer it to EVA foam, cut the pieces, heat-shape curved sections, reinforce the joins, and prepare the surface before painting. Start with smaller armor pieces before attempting a complete suit.
What is the easiest way to dye fabric for a costume?
Choose a dye compatible with the fabric, wash the material first, follow the dye instructions, and test a hidden section before treating the complete garment.
How do you make a costume more durable for wear?
Reinforce high-stress points, secure loose components, select materials according to their purpose, distribute weight properly, and test the complete costume by walking, sitting, and moving before Halloween.
What are good DIY techniques for costume accessories?
Start with a simple structural base, then add paint, fabric, weathering, hardware, or decorative elements. Focus on recognizable shapes and keep the accessory comfortable enough to carry throughout the event.
How do you fix a costume malfunction quickly?
Carry safety pins, fashion tape, adhesive, scissors, spare fasteners, thread, and strong tape. Repair the structural failure first, then fix the cosmetic details.